| 일 | 월 | 화 | 수 | 목 | 금 | 토 |
|---|---|---|---|---|---|---|
| 1 | 2 | 3 | 4 | 5 | 6 | 7 |
| 8 | 9 | 10 | 11 | 12 | 13 | 14 |
| 15 | 16 | 17 | 18 | 19 | 20 | 21 |
| 22 | 23 | 24 | 25 | 26 | 27 | 28 |
- Framework
- 프로퍼티
- @AspectJ
- unix
- POJO
- @test
- java
- Dependency Injection
- Linux
- 마이바티스
- AOP
- myBatis
- java spring
- @JUnit
- Spring Boot
- pointcut
- Di
- JdbcTemplate
- JDBC TEMPLATE
- spring aop
- STS
- XML
- Ubunt
- @Spring-Test
- 리눅스
- spring framework
- Spring JDBC
- spring
- SpringJDBC
- 컨테이너
- Today
- Total
개키우는개발자 : )
TypeScript 컴파일러 설정파일 본문
광고 클릭은 개발자(저) 에게 큰 힘이 됩니다!!'ㅁ'
| 타입 스크립트 컴파일러 설정 파일
기존의 커맨드 창에서 옵션을 직접 넣어 컴파일하는 방식이 아닌 설정파일을 작성하여 컴파일 하는 방법입니다.
설정 파일은 프로젝트의 최상단에 항상 만들어줍니다. 최상단 폴더에 tsconfig.json을 만들어 줍니다.
tsconfig.json파일에 작성합니다.
include : 컴파일할 파일 경로를 설정합니다. [ src폴더 하위의 모든 .ts 확장자를 가진 파일 ]
exclude : 컴파일 대상을 제외하는 옵션
compilerOptions : 실제 컴파일 할 경우 적용되는 옵션들
module : 어떤 모듈 방식으로 컴파일할지 설정
rootDir : 시작하는 루트 폴더
outDir : 컴파일 후 생성되는 js파일이 생성될 폴더명
target : 어떤 버전으로 컴파일할지 작성
{
    "include": [
        "src/**/*.ts"
    ],
    "exclude": [
        "node_modules"
    ],
    "compilerOptions": {
        "module": "Commonjs",
        "rootDir": "src",
        "outDir": "dist",
        "target": "es5"
    }
}
그럼 설정한 방식대로 폴더 구조와 추가 코드를 작성합니다.
저 같은 경우는 최상위 폴더명이 TYPESCRIPT이며 폴더 tsconfig.json을 만든 후
src 폴더를 생성합니다.

src 폴더 안에 hello.ts 파일 생성
import add from './util';
const returnValue = add(1,2);
console.log(returnValue);
util.ts파일 생성
export default function add(a,b){
    return a + b;
}

export function minus(a,b){
    return a - b;
}
그다음 커맨드 창에서 기존의 방식이 아닌 tsc라고만 입력하면 dist라는 폴더가 생기며 컴파일한 파일이 생성됩니다.

컴파일한 js파일을 node에서 실행시켜 봅니다.
node dist/hello.js add 함수가 실행되며 3이 출력됩니다.

index.html에 컴파일한 파일을 브라우저에서 실행시켜 보도록 하겠습니다.
기존의 es5 설정을 es6로 바꿔줍니다. 전 es6 배우는 중이니 es6로 할래요 tsconfig.json 수정
{
    "include": [
        "src/**/*.ts"
    ],
    "exclude": [
        "node_modules"
    ],
    "compilerOptions": {
        "module": "es6",
        "rootDir": "src",
        "outDir": "dist",
        "target": "es6"
    }
}
다시 컴파일 후 es6문법으로 변경되었는지 확인합니다.
root폴더에 index.html 생성 script 태그에 es6도 읽을 수 있게 type을 작성합니다. 그리고 dist폴더 안에 hello.js 경로 설정
<!DOCTYPE html>
<html lang="en">
<head>
    <meta charset="UTF-8">
    <meta name="viewport" content="width=device-width, initial-scale=1.0">
    <meta http-equiv="X-UA-Compatible" content="ie=edge">
    <title>Document</title>
</head>
<body>
    <script type="module" src="dist/hello.js"></script>
</body>
</html>
hello.ts 파일에 util.js import 후 다시 컴파일
import add from './util.js';
const returnValue = add(1,2);
console.log(returnValue);
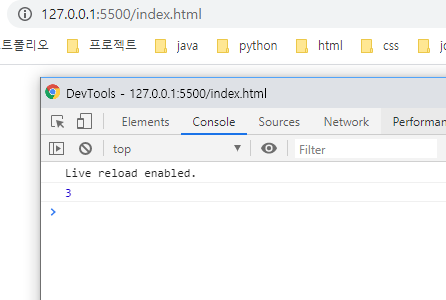
이제 index.html을 실행하면 됩니다. 저 같은 경우는 비주얼 스튜디오 코드 라이브러리 중 live server를 설치하여 html 파일들을 서버에 실행시킵니다.

설치 후 index.html을 열고 우측 하단에 go live 버튼을 누르면 5000번 포트의 서버가 열리며 우리가 작성한 함수가 콘솔 창에 보입니다.

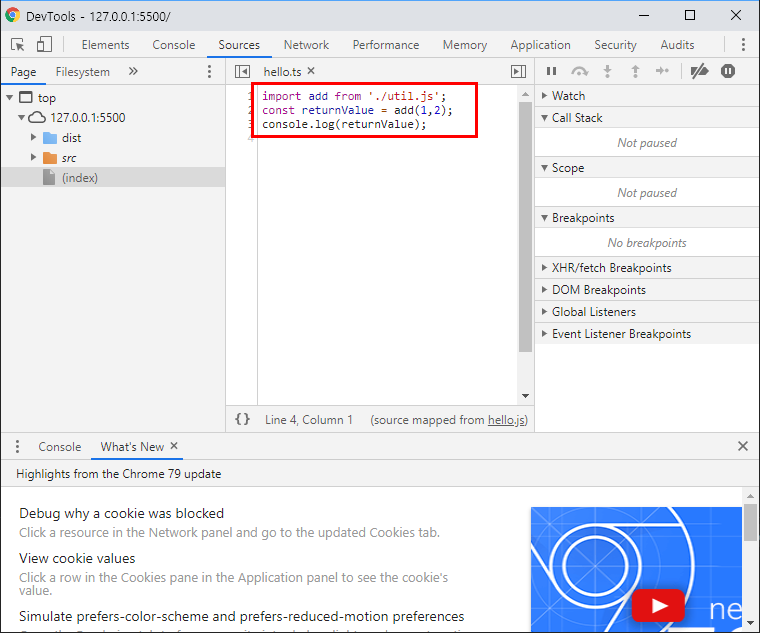
크롬 개발자 도구에서. ts파일 확장자의 실제 소스코드 보는 config option 설정
target 은 es5로 변경 -> sourceMap : true 작성 후 컴파일 tsc
{
    "include": [
        "src/**/*.ts"
    ],
    "exclude": [
        "node_modules"
    ],
    "compilerOptions": {
        "module": "es6",
        "rootDir": "src",
        "outDir": "dist",
        "target": "es5",
        "sourceMap": true
    }
}
크롬 브라우저의 개발자 도구에서. ts파일을 볼 수 있습니다.


tsconfig.json 파일에 "removeComments": true 옵션을 추가합니다.
ts파일에 작성한 주석들을 컴파일할 때 js파일에는 주석이 제거됩니다. 옵션을 추가하시고 ts 파일에 주석을 작성한 후 컴파일하시면 확인 가능합니다.
tsconfig.json 파일에 "noImplicitAny": true 옵션을 추가합니다.
이 옵션을 적용하면 함수의 파라미터에 any 타입을 사용할 수 없습니다. any는 숫자, 문자, 배열 등
상관없이 값을 받는데 noImplicitAny 타입을 적용하면 반드시 파라미터 값에 타입을 지정해줘야 합니다.

빌드 컴파일해보기.

'TypeScript > TypeScript' 카테고리의 다른 글
| TypeScript 인터페이스 (0) | 2020.01.04 |
|---|---|
| TypeScript 기본타입 (0) | 2020.01.03 |
| TypeScript 변수선언 (0) | 2020.01.03 |
| TypeScript 컴파일러 (4) | 2020.01.01 |
| TypeScript 시작하기 (0) | 2020.01.01 |


